Philosophy of Education
In my experience, art has been dominated by a certain demographic, excluding and almost degrading art that did not fit within their standards or liking. The one of the most significant philosophies I stress is inclusivity. As someone who is of Indigenous and Mexican descent, I strive to revive traditional art and techniques that hail from my cultures. I feel that it is imperative that I aim to provide my future students an exposure to a diverse range of art from underrepresented cultures, so that perhaps some of them may feel represented or feel inspired by something unfamiliar to them.
First Project: A Podcast
For our first project, we were assigned to create a podcast. I choose to create a podcast on an artist that comes from an unrepresented background, someone that I was unfamiliar with. The most entertaining portion of the project was researching the artist! I watched several videos on her creative process, her inspiration, her techniques and materials she utilizes. As someone who is familiar with beading, I was in awe of the detail, the materials, and the meaning behind her beadwork. She has inspired and motivated me to practice my beading skills. I hope to meet her or at least see her works In person.
Second Project: Group Project
Bringing Arts to the Community: Creating Site-Specific Public Art
Indeed, I feel that our second project will be the most difficult. The most difficult portion of this assignment was not the actual project, but it was learning how collaborate with others. If there was a disagreement of ideas, then we learned to sort it out. If there were too many ideas, we had to condense them. If there were too many distracting idea, then we had to refocus. Furthermore, communicating with my group was the second hardest portion of the project. Texting and emailing helped, but the most effective method of communication is always face-to-face. My group and I met once during the weekend, and in a single day, we made incredible progress.
Moving on, the actual project was very enjoyable, despite it requiring multiple components. It was difficult to settle on an idea, but once my group and I settled and sorted, the rest of the project became more manageable. This project taught me more about making lesson plans and preparing projects for students.
Moving on, the actual project was very enjoyable, despite it requiring multiple components. It was difficult to settle on an idea, but once my group and I settled and sorted, the rest of the project became more manageable. This project taught me more about making lesson plans and preparing projects for students.
Third project: 3-d Modeling and printing
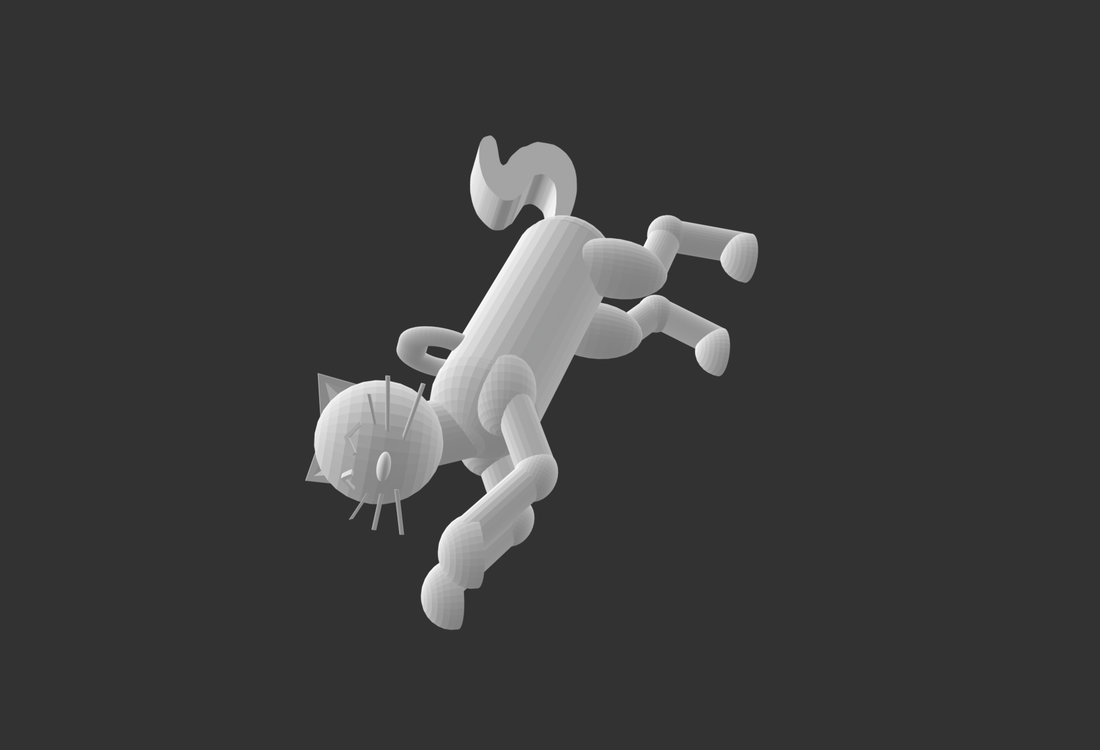
For 3-D modeling and printing project, we were tasked with creating a 3-D animal. The animal we choose would have to represent us in some way, meaning the animal had to have specific meaning to us. I choose to create a 3-D model of a cat because I feel a cat's characteristics embody me the most. They like to lounge, nap, investigate, and do the exact opposite of what you ask. Furthermore, the 3-D animal model had to be wearable. I choose my project to be wearable as a keychain.
In order to create the actual model, I used a free online website called TINKERCAD. The website allows you to manipulate basic shapes to create projects. The learning curve for the website was difficult for me to learn, so the amount of time it took for me to finish the project was lengthy. The hardest technique to master was connecting the shapes. There were times when I thought I had connected the shapes, only to find out that they were on separate planes.
Overall, I enjoyed the concept of the project. I know I would have enjoyed the assignment more if I had learned how to use TINKERCAD better.
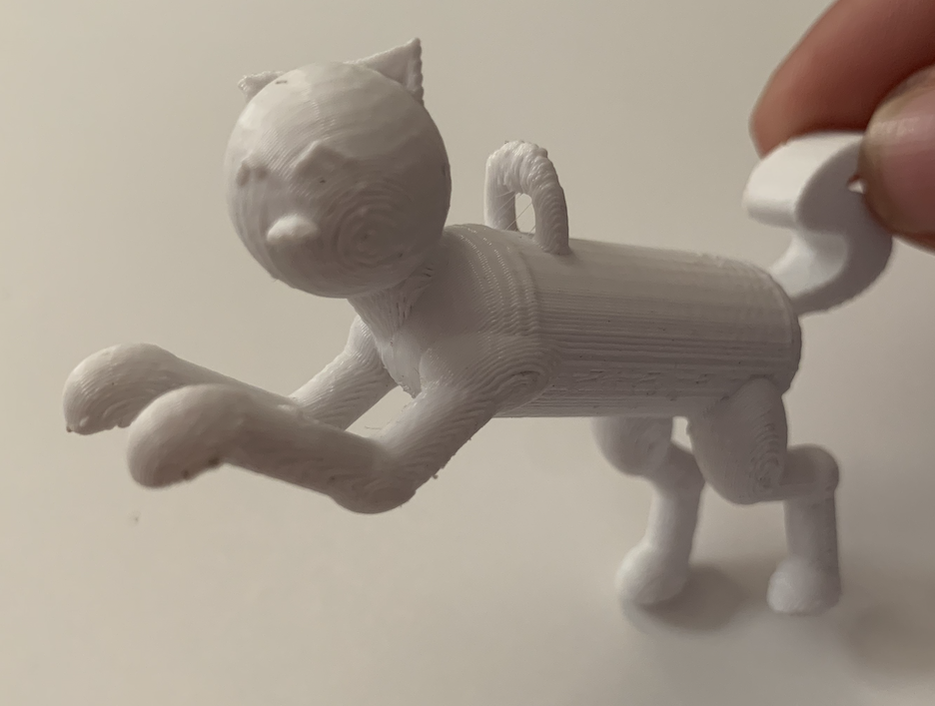
Kitty cat printed out
Fourth project: an animation video
For our animation video, we had to choose one of three ways to create an animated video. I choose to draw my "props," cut them, and move them little by little. The most enjoyable part of this project was drawing the "props." I had the freedom to draw them as I liked and in any style I wanted.
As for the most difficult aspect of the project, it would definitely be the tedious process of moving the props in small motions, then taking a picture. It was difficult to move the props as they were supposed to without disturbing the rest of the cut outs. I had to make sure the motions were sensible and not too rushed. In order to do that, I repeated some images to allow more time for the frame to show. Another difficult aspect of this project was trying to control set. By this, I mean trying to keep consistent lighting, focus, and angle was tricky. I used a small lamp to try to keep consistent lighting and a make-shift tripod to keep focus and the same angle.
This project taught me more about the process of creating an animation. It takes patience, time, and consistency to produce a viable video to present.
Final project: A how-to video tutorial
For my final project, we had to film, edit, and narrate a how-to video. I filmed the video using my iPhone and a DIY tripod. I edited the video using iMovie. If this project had been assigned in the beginning of the semester, I would have been extremely lost. However, now that I have more knowledge about editing and filming, this tutorial was fairly easy to make. The hardest part of this project was filming. I tried to keep the lighting under control, find the right set up, and make sure my voice was loud and clear. Another challenging part of this project was trying to explain it! I had a hard time trying to phrase my sentences and give directions because this technique is quite natural to me. I had to imagine myself as someone who was completely clueless on beading.
I decided to do a tutorial on the two needle flat stitch technique. The two needle flat stitch technique is the first step in beadwork. This is how beads are sewn onto the material one decides to bead on. I usually wear beaded earrings everyday and often get asked on how I make them. Beading is a very time-consuming and tedious process. Given this, filming a tutorial on how to create an entire beaded work would have taken a long time. I opted to focus on this specific step, the most important one. Beading is central to my culture, and I hope this video educational to those who are unfamiliar with it!
I decided to do a tutorial on the two needle flat stitch technique. The two needle flat stitch technique is the first step in beadwork. This is how beads are sewn onto the material one decides to bead on. I usually wear beaded earrings everyday and often get asked on how I make them. Beading is a very time-consuming and tedious process. Given this, filming a tutorial on how to create an entire beaded work would have taken a long time. I opted to focus on this specific step, the most important one. Beading is central to my culture, and I hope this video educational to those who are unfamiliar with it!
